If you are a fan of Vietnamese Pho, you may have to let your regular Vietnamese take-out down easy. We used to order this tasty, rice noodle soup on a weekly basis and now I don’t remember the last time we ordered take-out when it’s this easy (if you have all the ingredients on hand), and yummier and healthier to make at home.
Now heads up…this IS an Instant Pot / pressure cooker recipe but I will walk you through the steps. And if you don’t have an instant pot, well, what can I say…you’re severely missing out on this delicious soup that can be made in less than an hour (and that includes cooking a WHOLE chicken).
Also…just as an FYI…traditional Pho is typically prepared with beef broth and thinly sliced raw beef. This recipe is a chicken version but JUST as tasty.
INGREDIENTS
NB: Try to source organic wherever possible!
For the broth:
- 1 whole organic chicken (approximately 3-4 lbs, no bigger!); try to source pasture-raised
- 2-3 tbsp of extra virgin (EV) olive oil (or ghee)
- 1 heaping tbsp coriander
- 10 ml cloves
- 1/2 tsp turmeric
- 1 tsp ground pepper (or more if you like pepper)
- 2 tsp Kosher salt
- 2 tbsp fresh minced or chopped ginger
- 1 head of garlic (approximately 10-12 cloves)
- 1 large yellow onion, cut into big slices/chunks
- 1 apple, peeled, cored and cut into small bite size pieces
- 1 carrot, cut into big chunks
- 1 large handful of cilantro (briefly chopped with sprigs)
- 1 tbsp fish sauce
- 1 tbsp of maple syrup
- 7 cups water
For the bowls:
- 1 package of Thai rice noodles (not vermicelli; you want the thickness of a Pad Thai noodle); follow instructions on the package for cooking the noodles and then set aside
-
- NB! It’s ok if the noodles get sticky and/or cool after cooking; you can always run them under water and also, keep in mind that they will separate and warm when you pour the hot broth over them. I tend to cook mine while the broth is cooking and then leave them in the kitchen sink in a strainer so I can pour hot water over them quickly (to separate them) just before serving
-
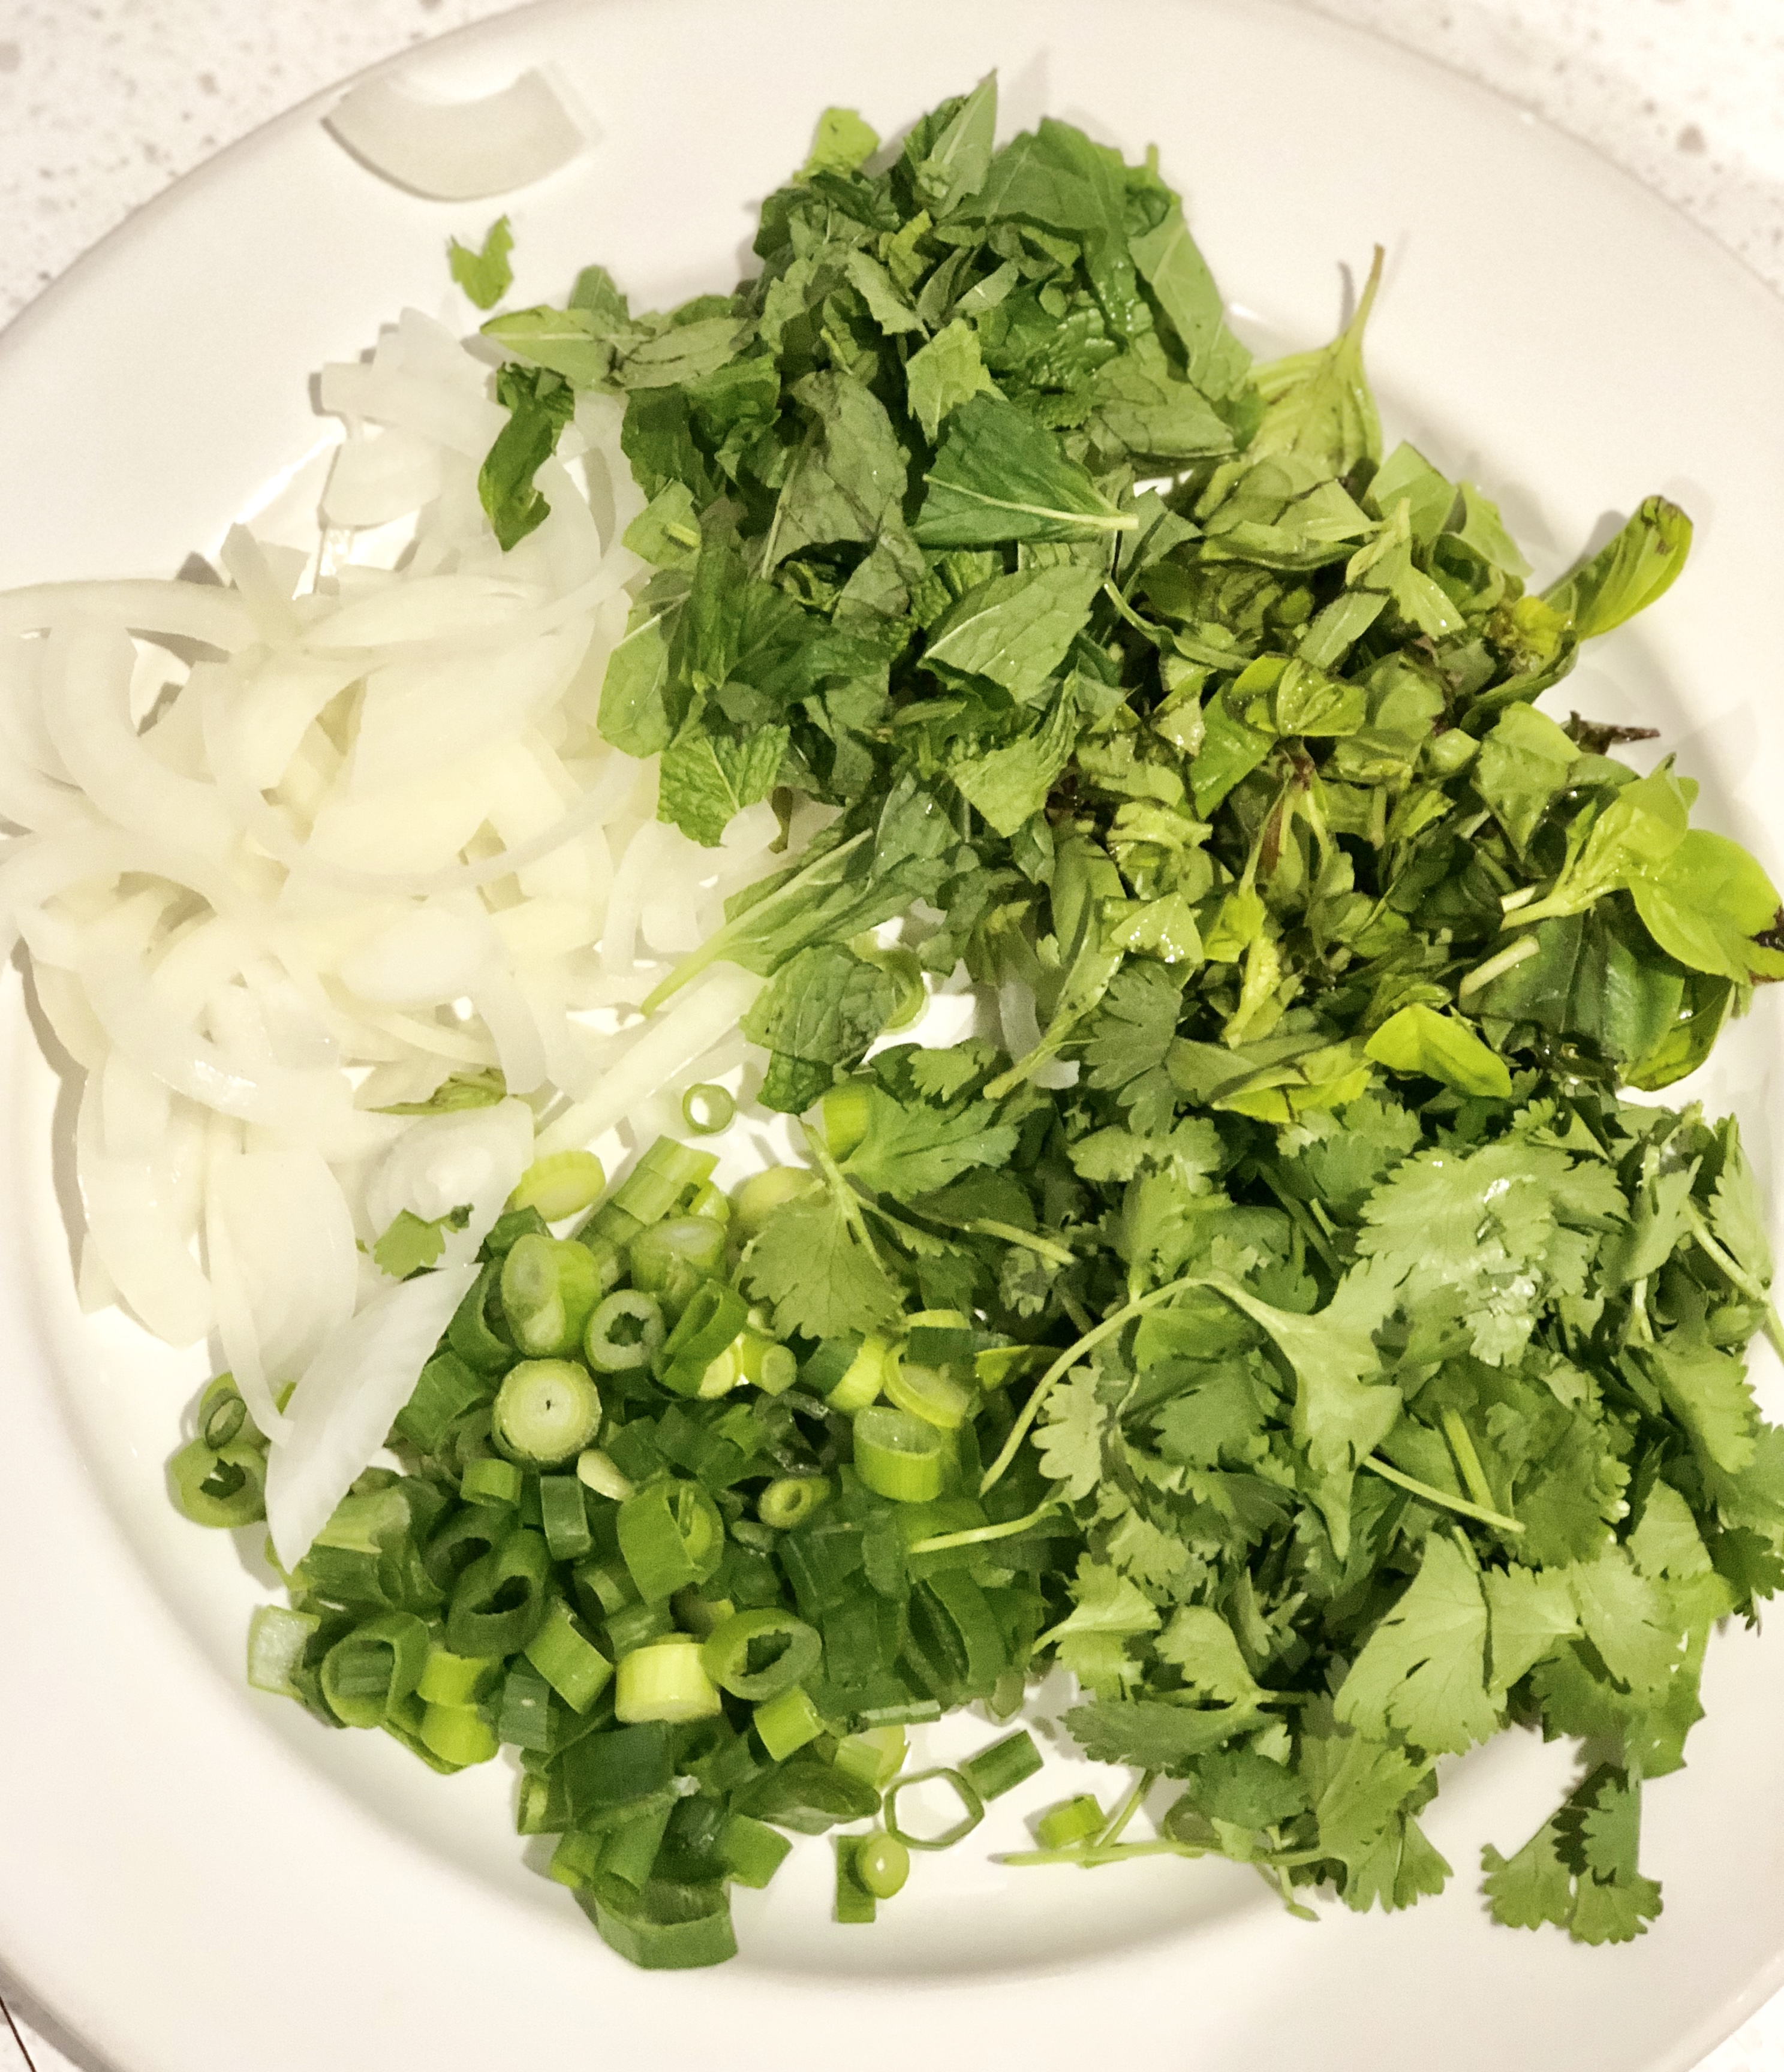
- 1/2 small yellow onion, thinly sliced and soaked in water for 10 minutes (this helps to take off the “bite” of eating a raw onion as you will be serving them raw in the broth)
- 3 green onions, chopped
- large handful of freshly chopped cilantro, leaves only
- Fresh basil (l like to serve whole leaves in a bowl and let each person break apart their basil leaves with their hands and place into their soup, similar to how traditional Pho is served)
- lime wedges (for garnish and serving)
- (optional) handful of bean sprouts
-
- NB! Bean sprouts are considered to be inflammatory (pending who you ask) so I don’t include them, but I still like to serve a bowl for anyone else eating the Pho who are not particular to my/our anti-inflammatory restrictions
-
- (optional) thinly sliced jalapenos (for those of you that like spice and aren’t avoiding nightshades for inflammatory reasons)
DIRECTIONS
STEP 1: Prep work
- make sure whole chicken is thawed
- mince whole head of garlic
- chop/mince ginger
- chop the large yellow onion into big chunks (these are simply for flavour when making the broth)
- chop the small yellow onion in half, then make thin slices and place these thin slices in a bowl of water for 10 mins then drain (these are to be set aside for serving)
- chop cilantro into 2 parts: (1) large pieces and sprigs for the broth and (2) smaller chopped leaves for serving
- peel, core and chop apple into bite size pieces
- chop carrot into big bite sized chunks
- get seasonings ready or accessible (coriander, cloves, turmeric, pepper)
- make Thai noodles and set aside; you can also choose to make the noodles after the broth is made…it’s up to you…I like to make my noodles and get this step out of the way so we can eat as soon as the chicken and broth are ready.
STEP 2: Make the broth
- plug in your pressure cooker and press the “Saute” button (for Cosori brand cookers, you have to press the “Saute” function and then press “On/Start”)
-
- NB! Set your Saute temperature to approximately 200 so that it doesn’t get too hot, too quickly (the Cosori cookers are pre-set at 284F and I find this WAY too hot so I manually reduce the temperature setting to 200F)
-
- throw in your EV olive oil or ghee and let it heat up for a minute or two
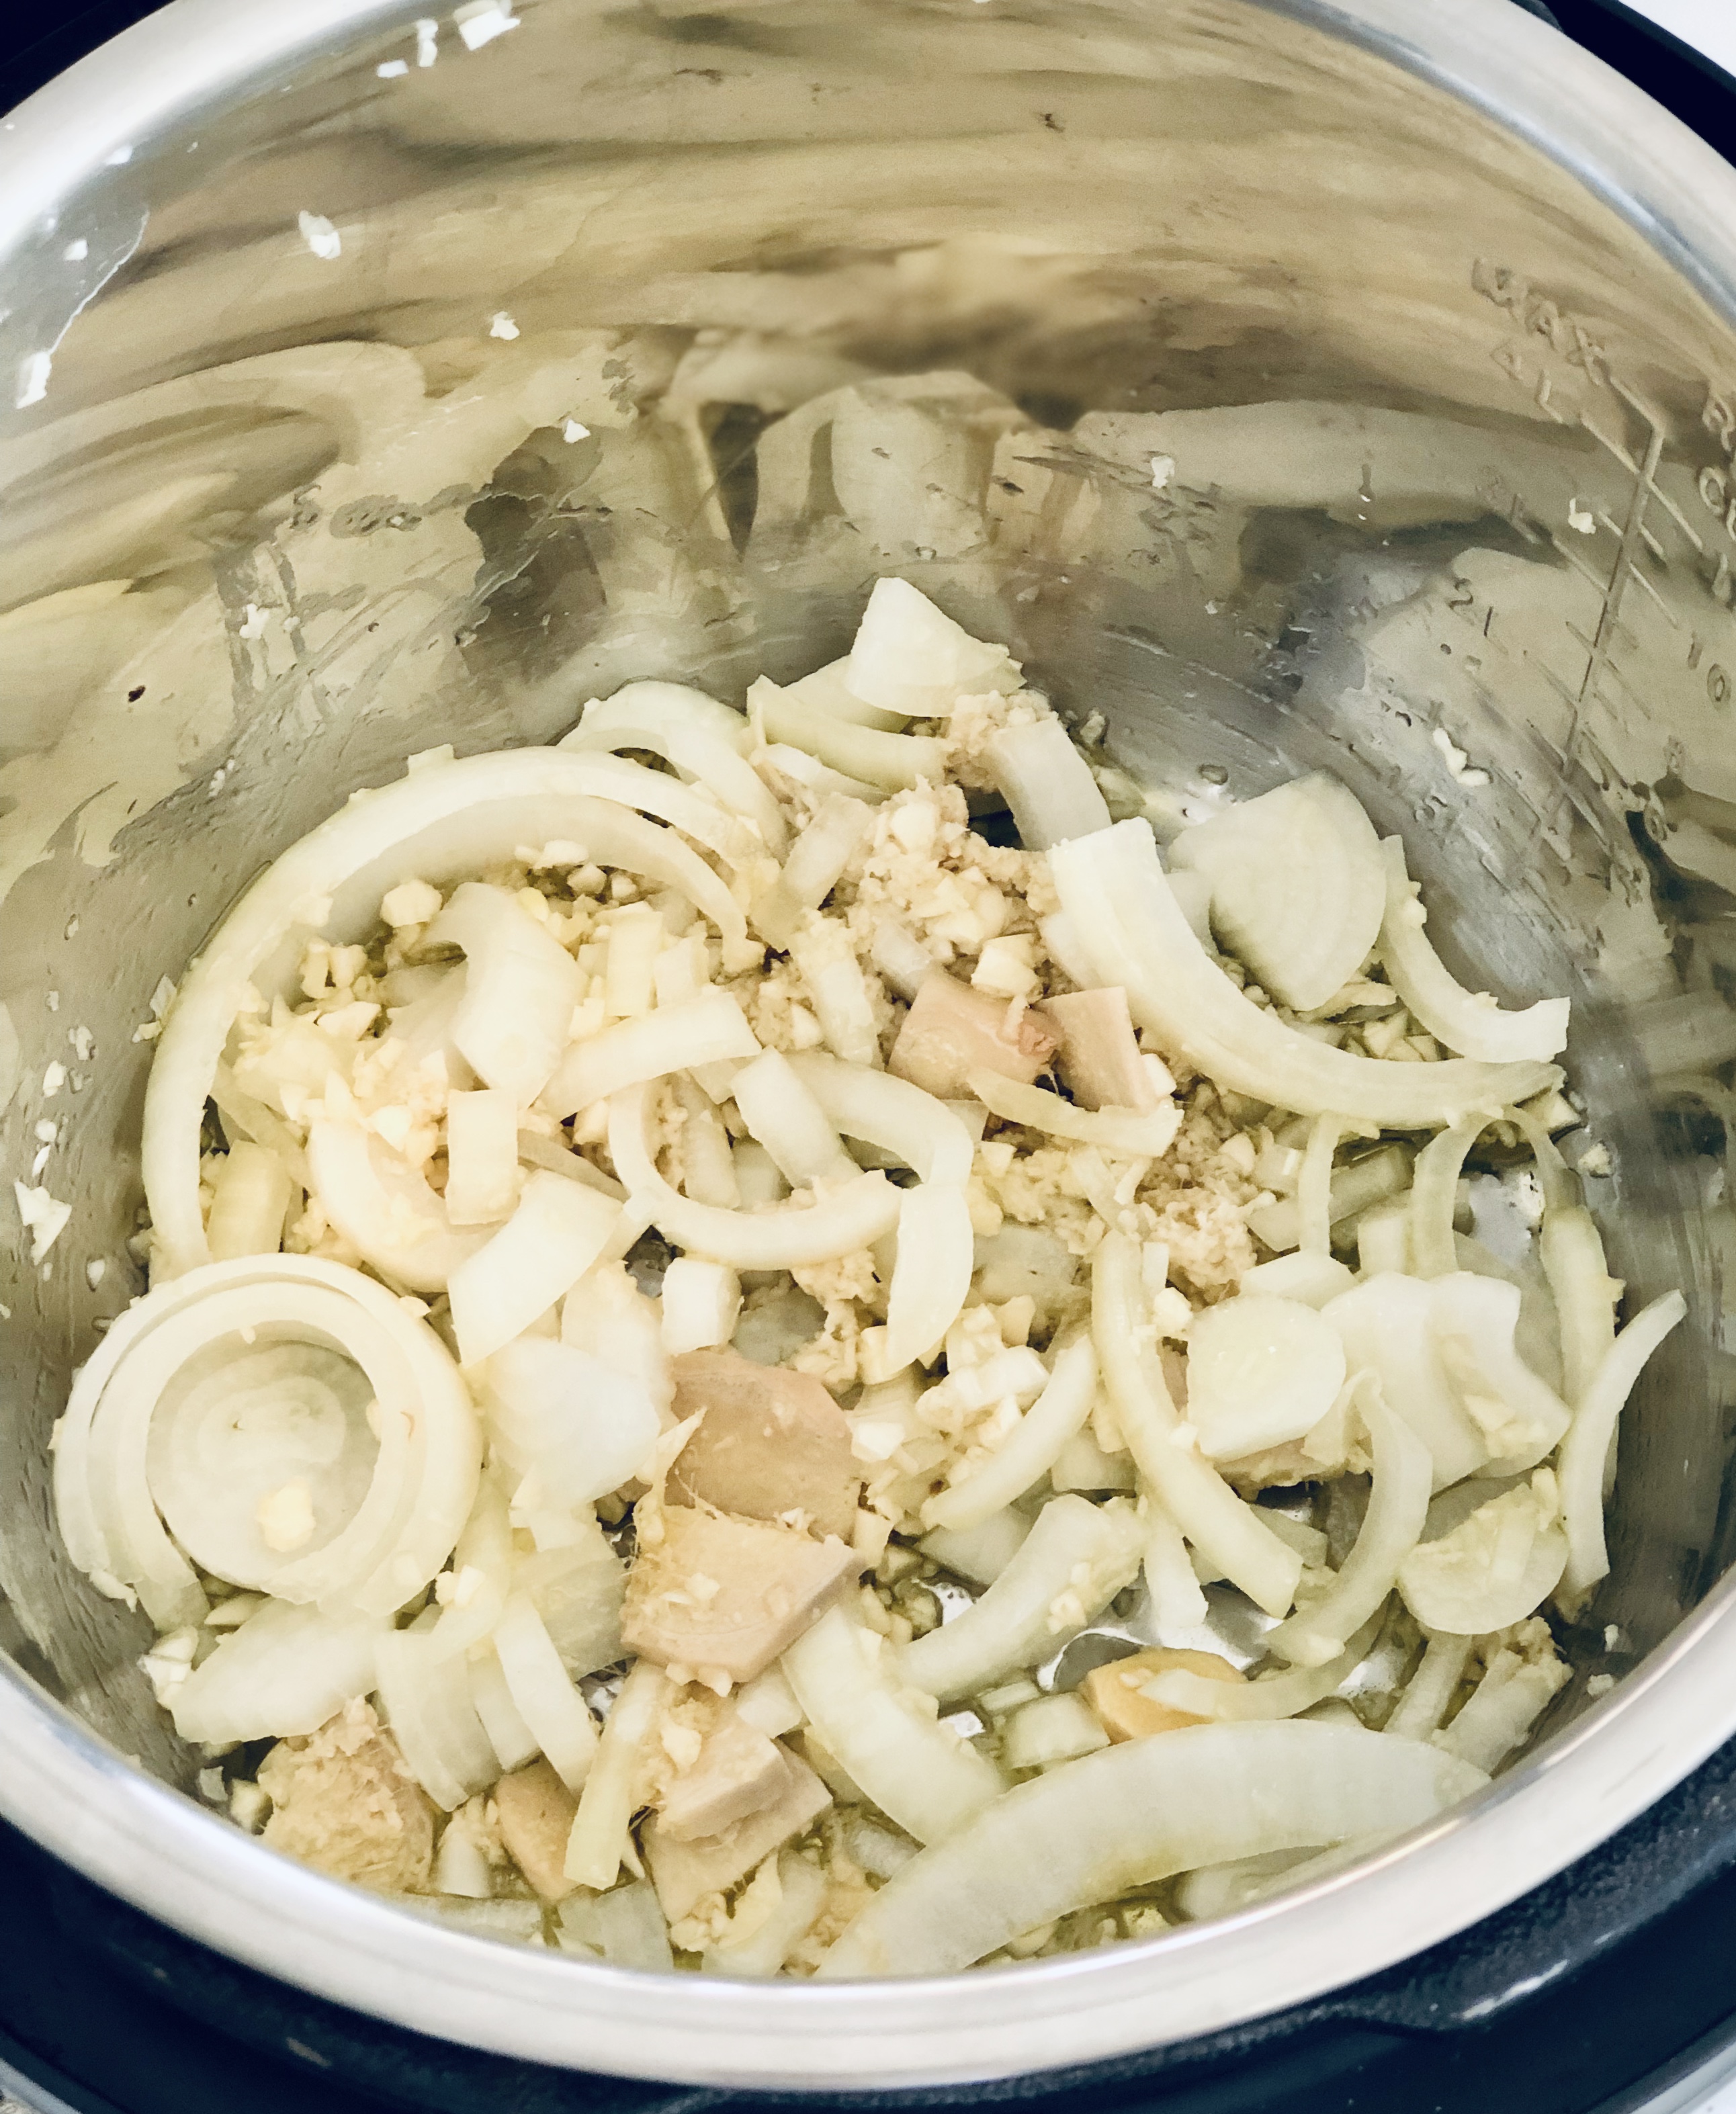
- then add your chunky onions (not to be confused with the thinly sliced onions you have set aside for your bowls), carrots, garlic and ginger
- then add coriander, cloves, turmeric, and pepper
- stir everything together for a few minutes while onions soften and to allow flavours to blend and become aromatic
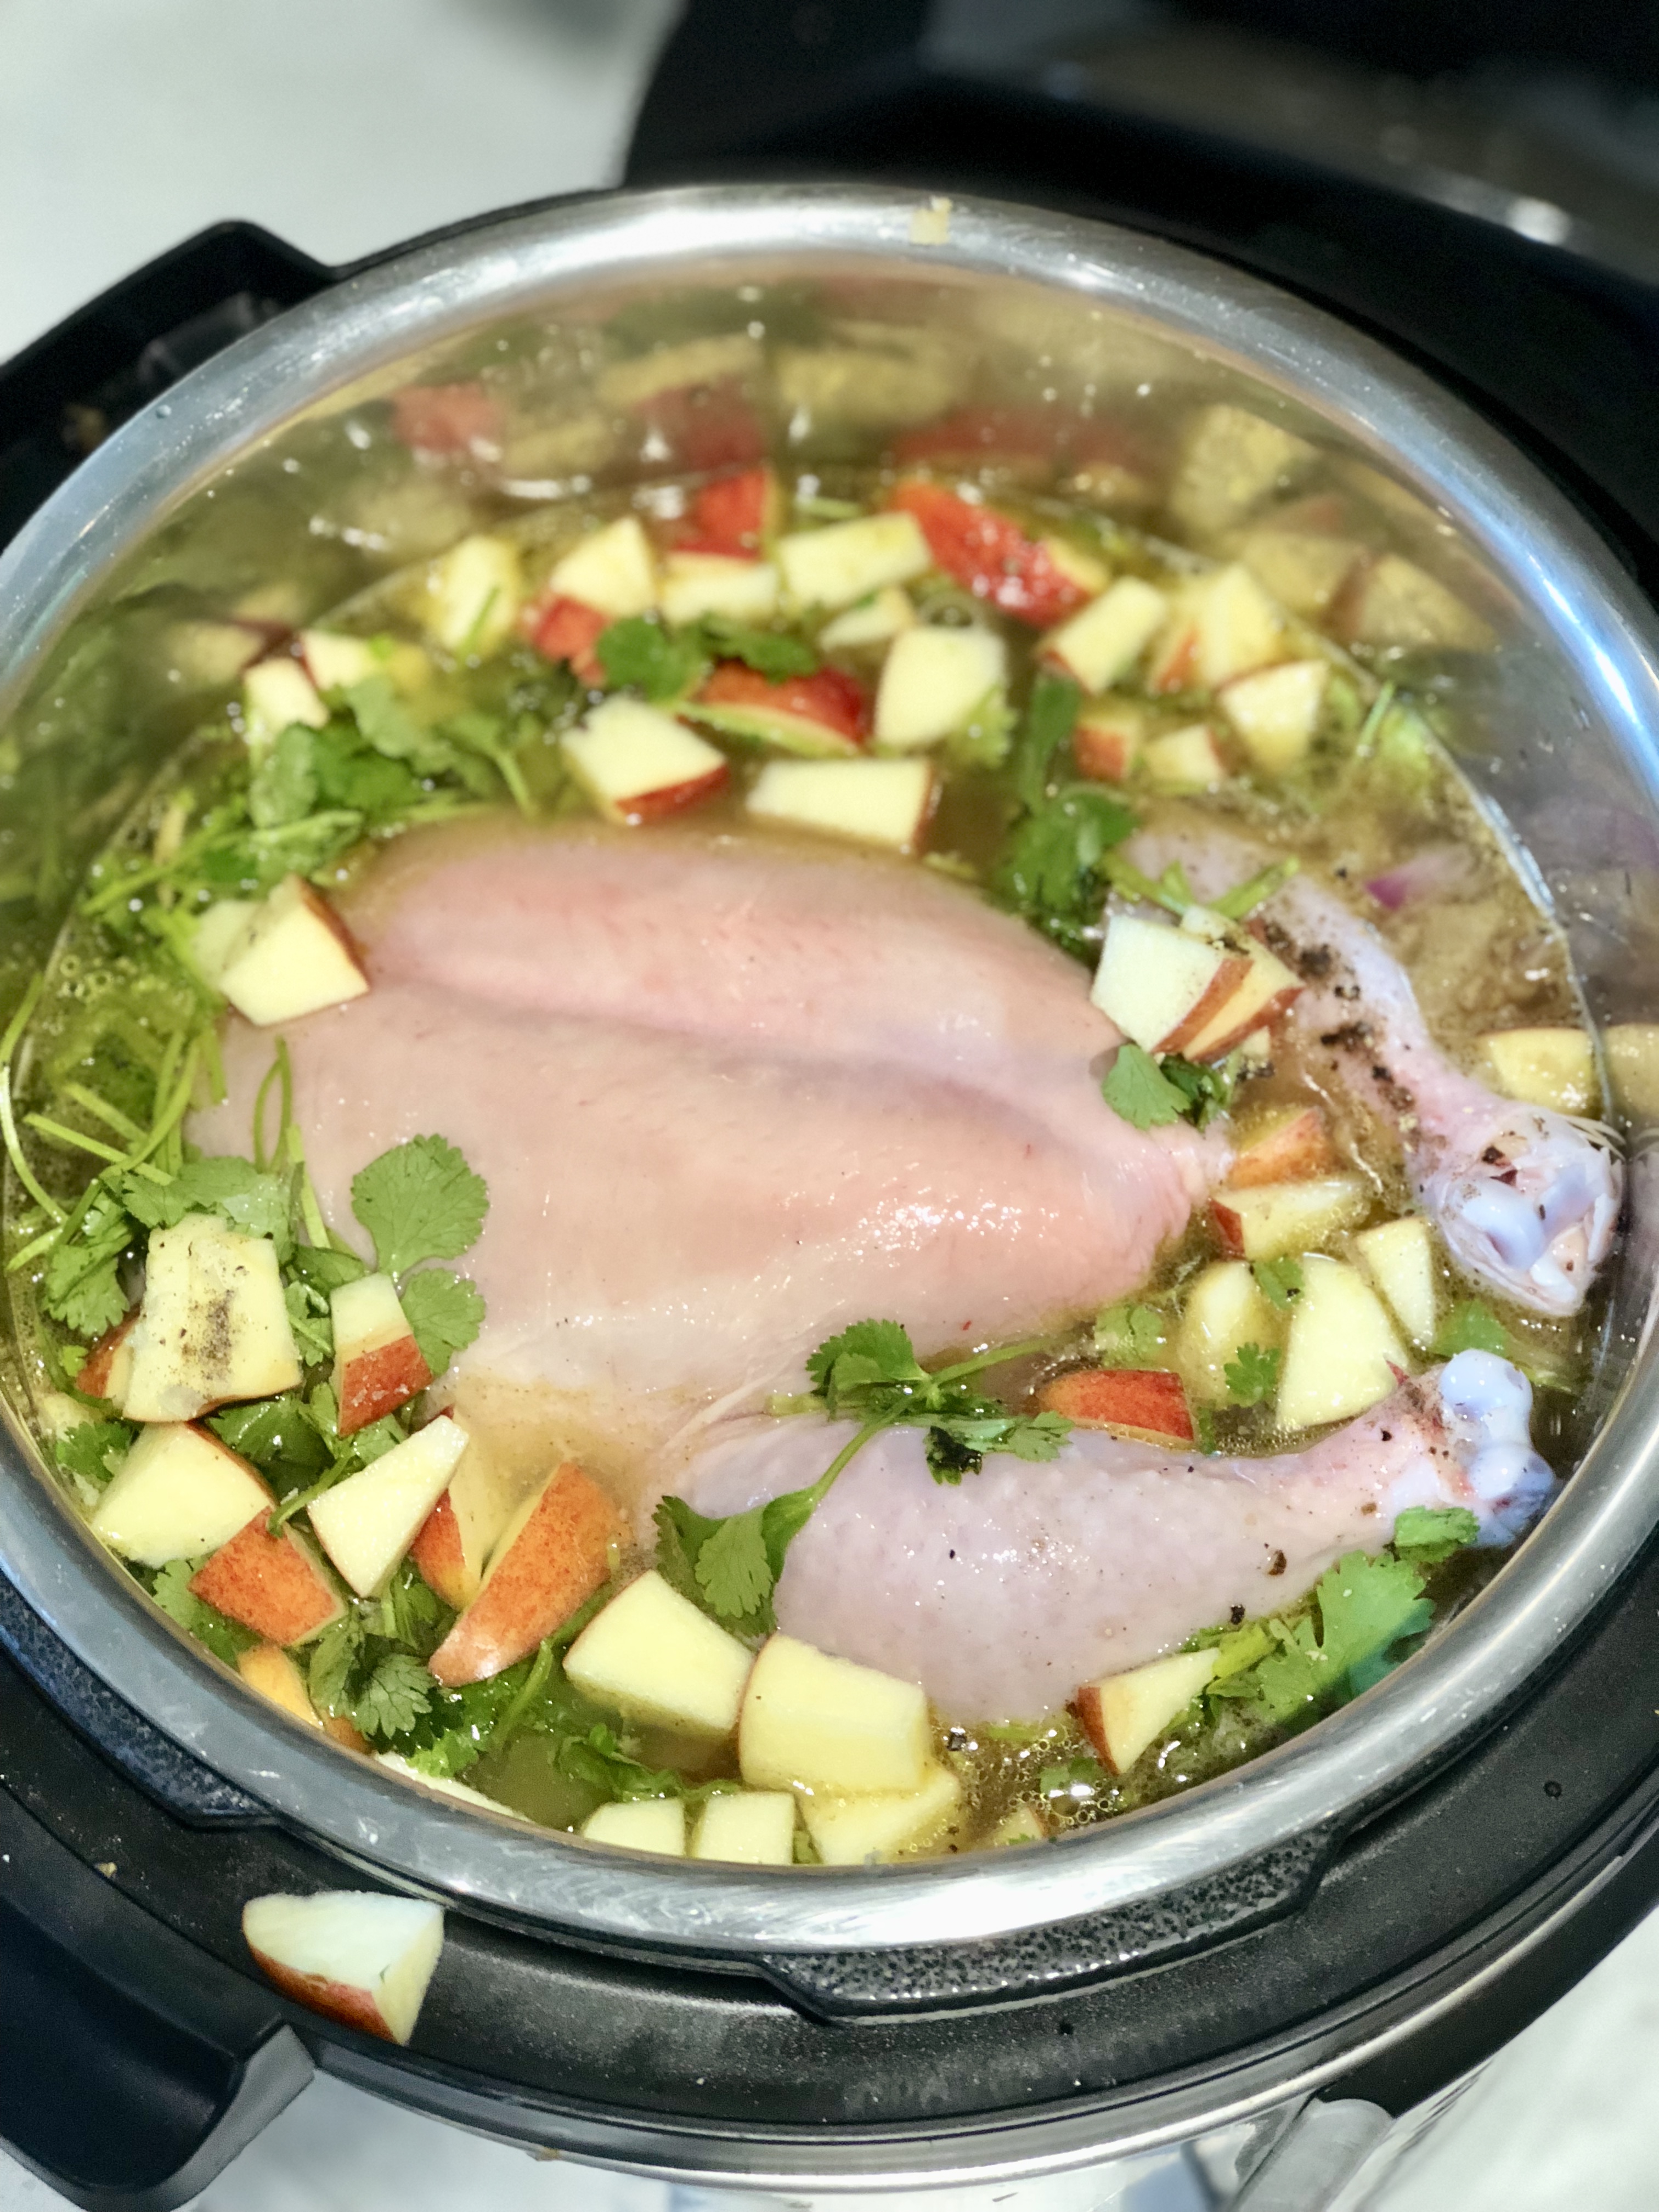
- then add 4 cups of water
- then place your whole chicken (boobies up) into the pressure cooker (it will be slightly submerged in the water)
- add salt, apples and cilantro (the big pieces/sprigs, not to be confused with the chopped cilantro you have prepared for the bowls)
- add remaining 3 cups of water
- then START THE PRESSURE COOKING PROCESS:
-
- turn your pressure cooker to Off or press Cancel (remember it’s still in Saute mode at this point)
- put the lid on and turn the valve to the locked or sealed position
- then press the Manual button and then set the Timer button to 14 minutes
- then press the Temp/Pressure button and set to High
- then press On/Start
-
- After 14 minutes, let the pressure cooker “naturally release” for 20 minutes… which means, do absolutely nothing for 20 minutes (the timer on your pressure cooker will start counting back UP after it has counted down to 14 minutes; let it count back up to 20 minutes)
-
- FYI / Quick Tip: As opposed to “Natural Release”, if a recipe calls for “Quick Release” of your pressure cooker then you simply flick open the pressure valve (and stand back!) when the timer goes off – this releases all the pressure all at once and stops the cooking process.
-
- After the pressure cooker has naturally released for 20 minutes, release the valve at the top to release any remaining pressure (there should be hardly any) and remove the lid…inside you will find your home-made broth AND your fully cooked chicken!
STEP 3: Remove and cool the chicken
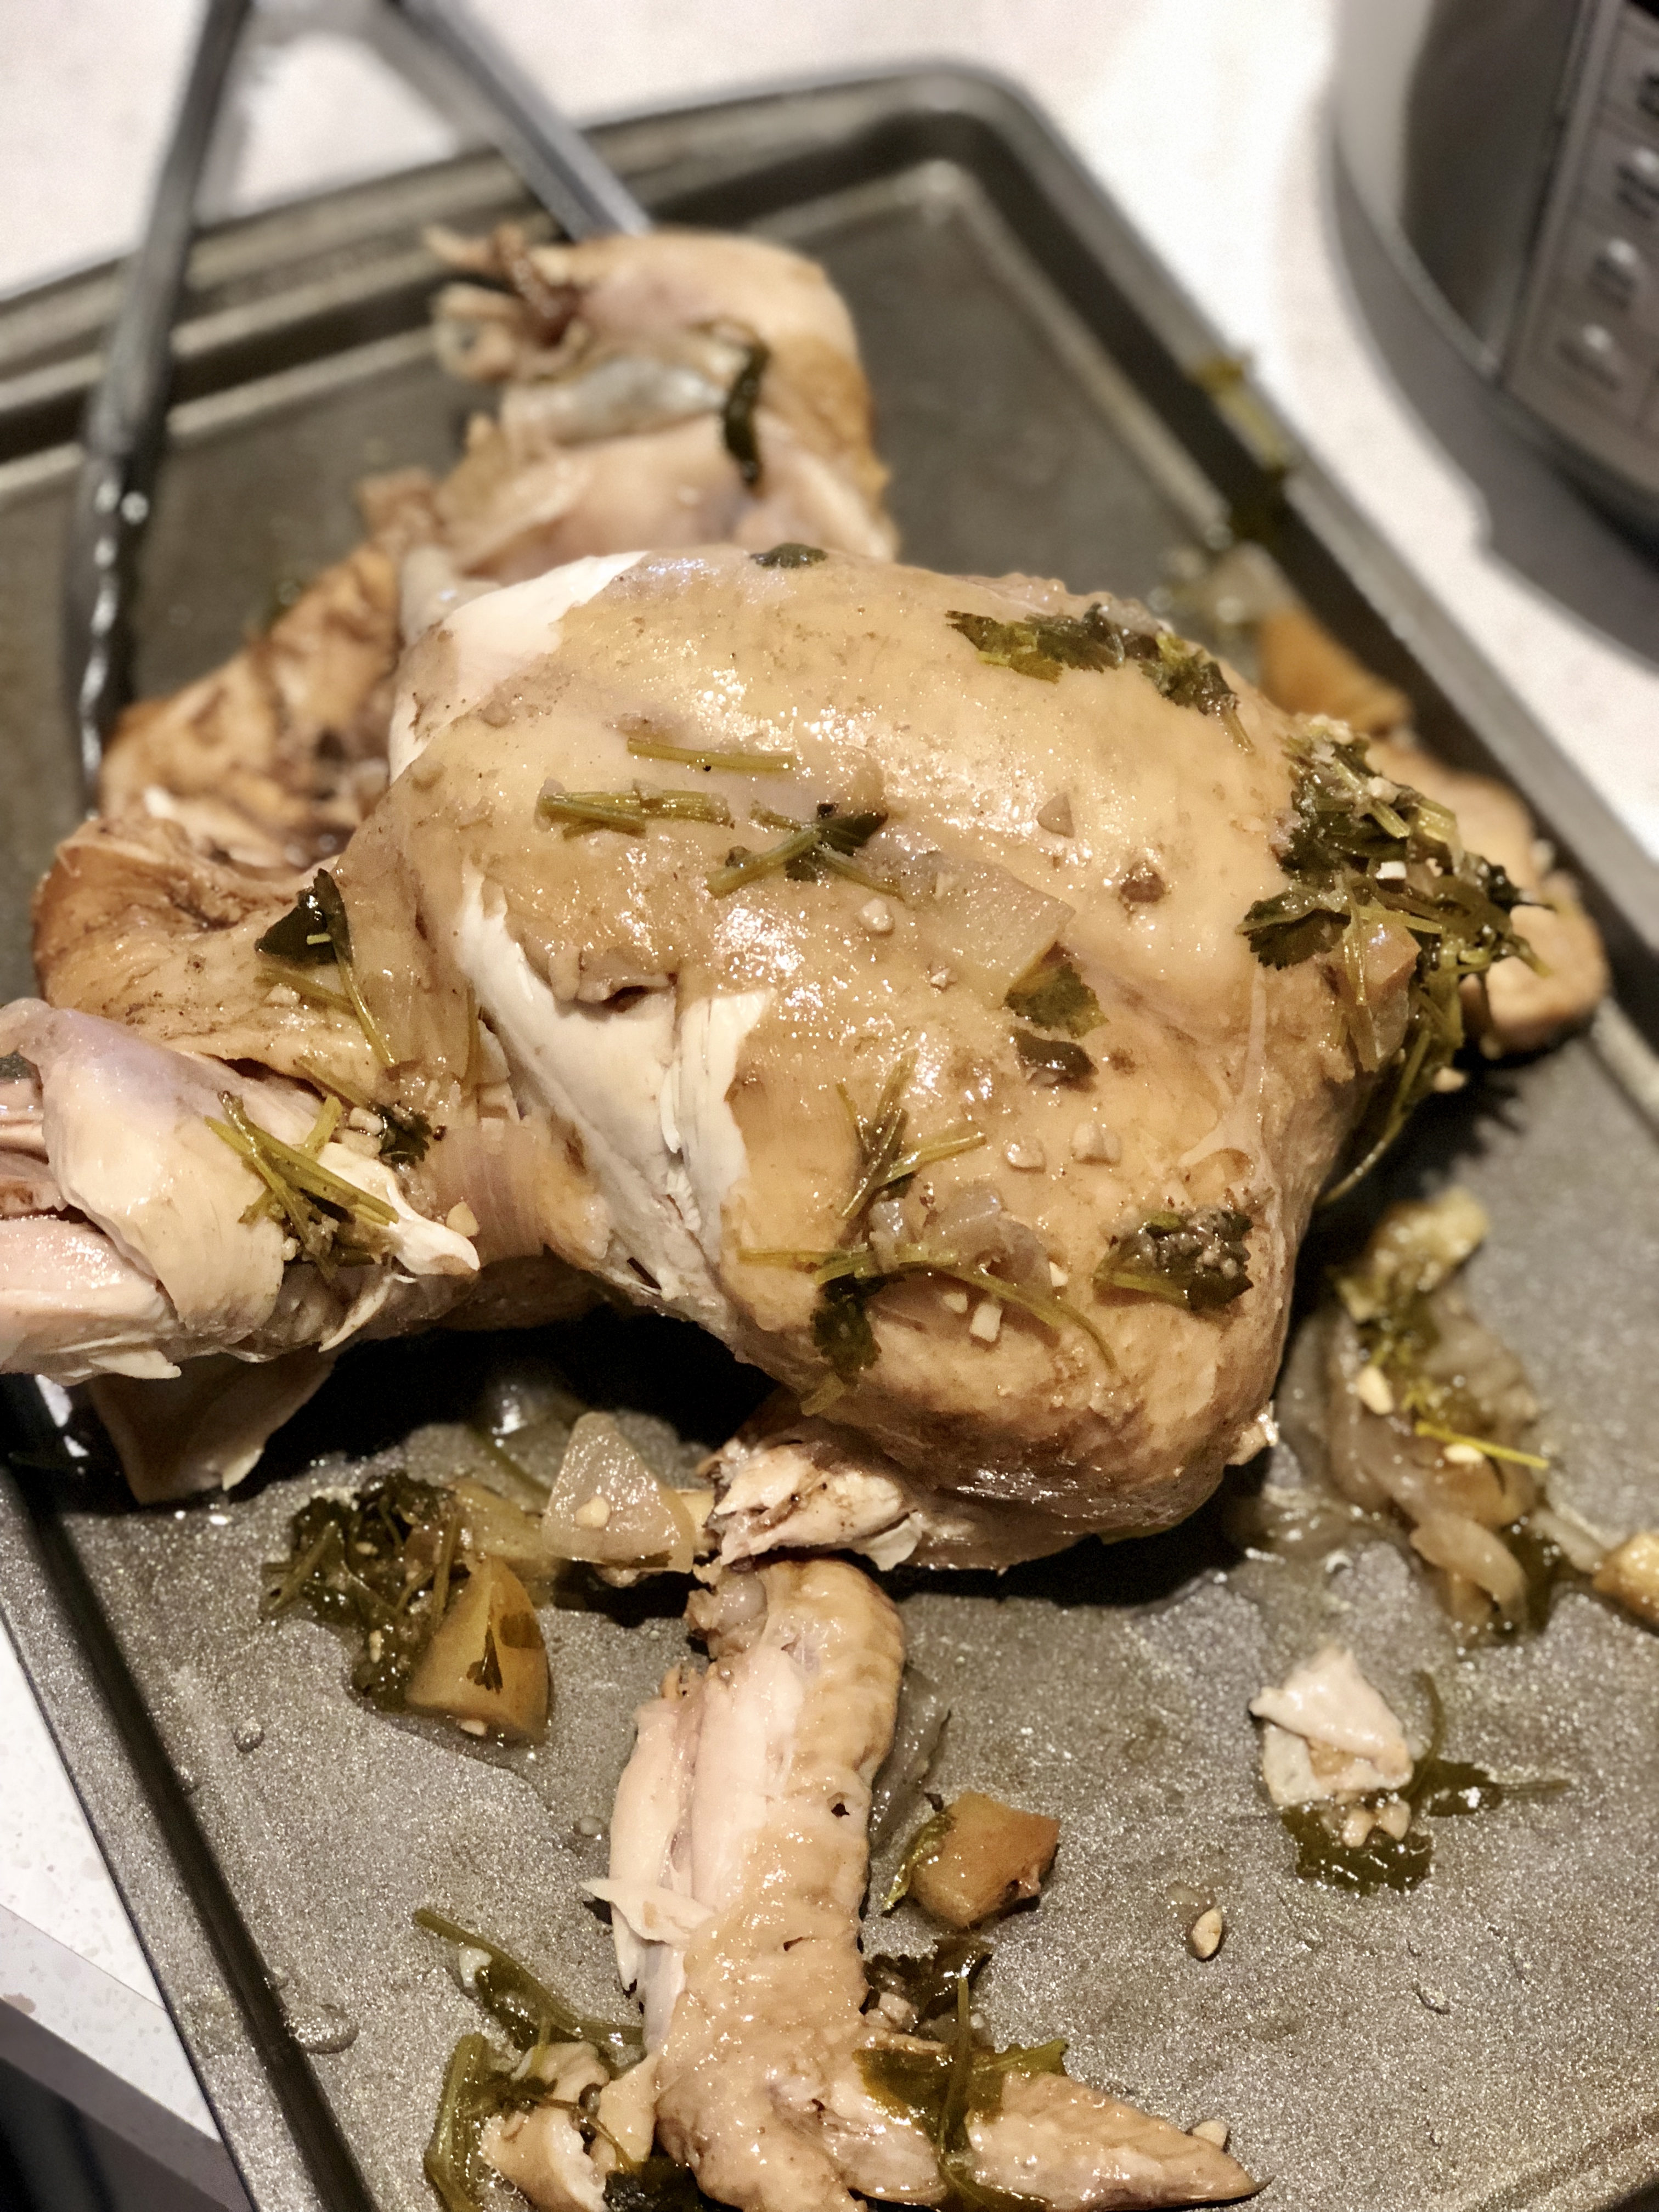
- before pulling out the chicken from the pressure cooker, place a baking sheet beside the pressure cooker
- then using large tongs, lift and remove the chicken from the cooker and place it on the baking sheet
-
- the chicken will look rather horrendous (see pics); it will literally look like a boiled chicken with half it’s skin falling off and will be incredibly fragile – it’s ok if it falls apart into pieces!
-
- let the chicken cool while you prepare your broth
STEP 4: Straining the broth
- Using tongs, pull out/remove any large pieces of veggies from the pressure cooker and discard
- then place a large strainer OVER a large bowl (don’t do what I did once and pour all the home-made broth into a strainer directly down the drain because I forgot to put a bowl underneath to catch the broth)
- pull out the metal insert/bowl from the pressure cooker and pour the broth and all remaining solids into the strainer; using the back of a spoon, you can gently push down on the solids in the strainer to squeeze out any last remaining broth into the bowl underneath
- discard/compost all remaining solids captured in the strainer
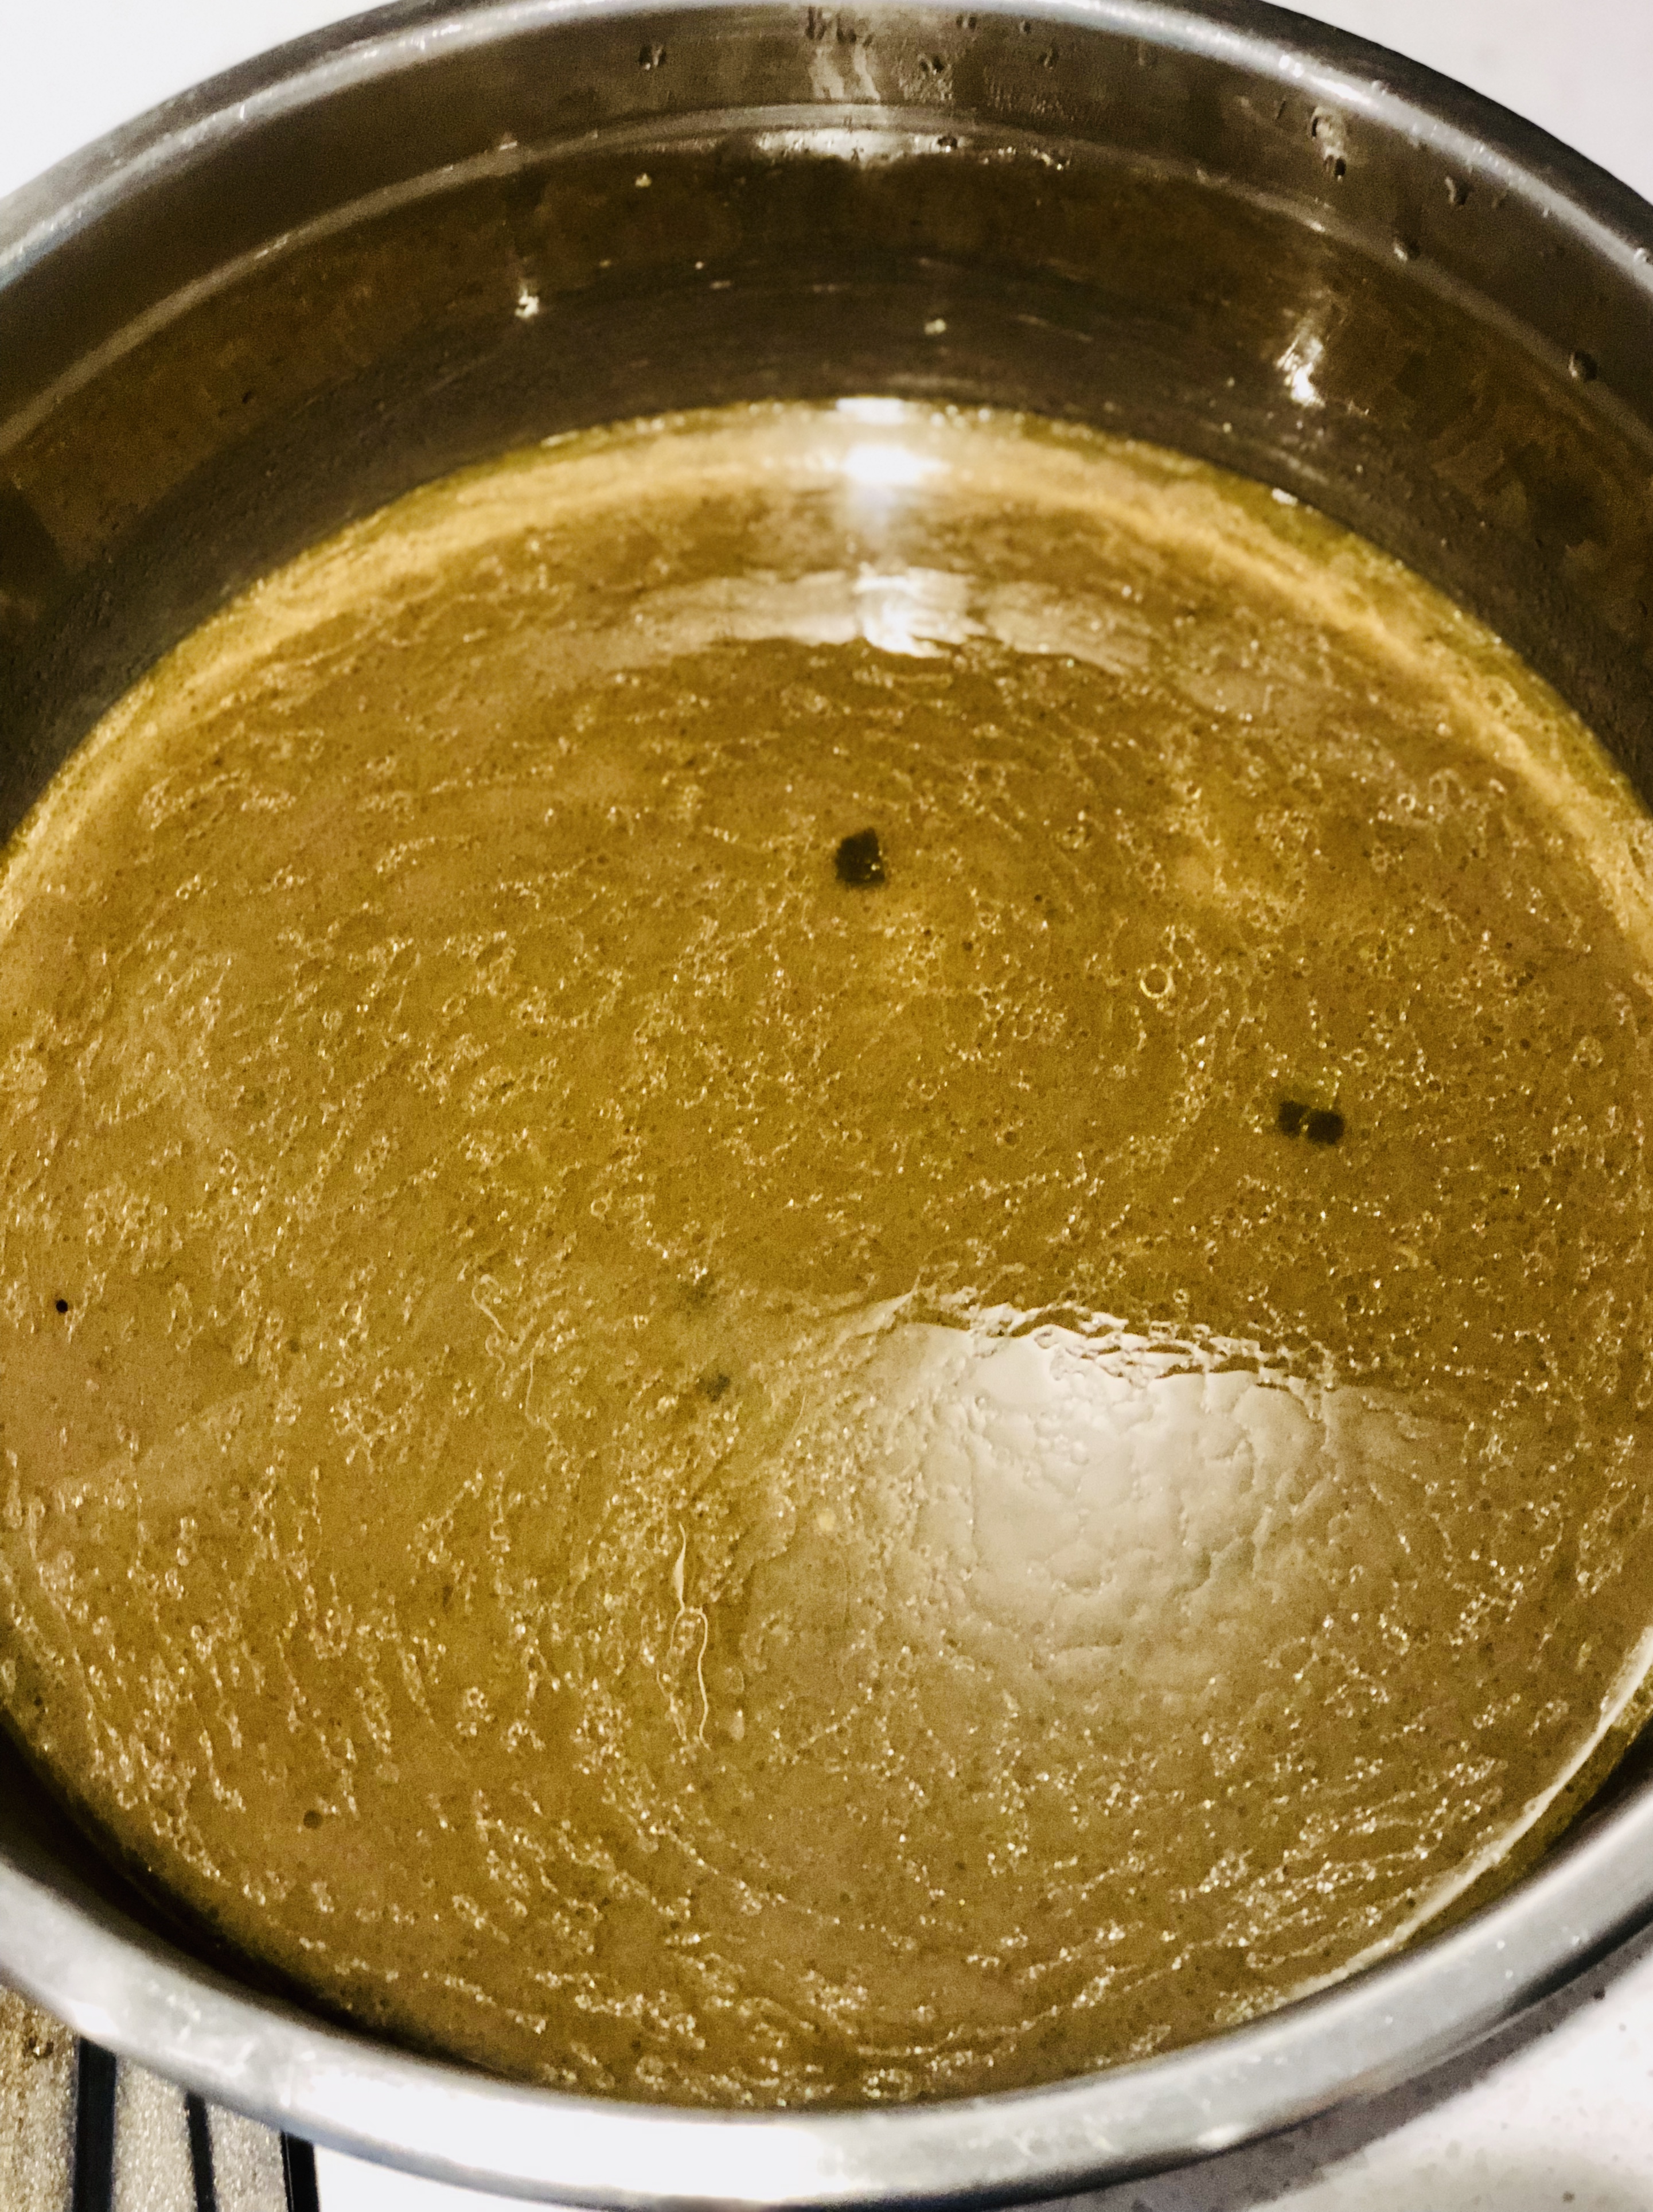
- then pour your broth BACK into the metal insert of the pressure cooker and put it back into the machine and set to “Warm” mode (this will help to keep your broth warm; if you’re not serving it right away you can also re-heat it in your pressure cooker (using the Saute function) when ready to eat)
- you may also want to skim the fat off the broth; you can do this using a spoon or ladle (see this quick youtube video if you’re not sure)
- last but not least – don’t forget to taste and season your broth at this stage:
-
- add 1 tbsp fish sauce
- add 1 tbsp maple syrup
- add any additional seasonings to taste (e.g. salt and pepper)
-
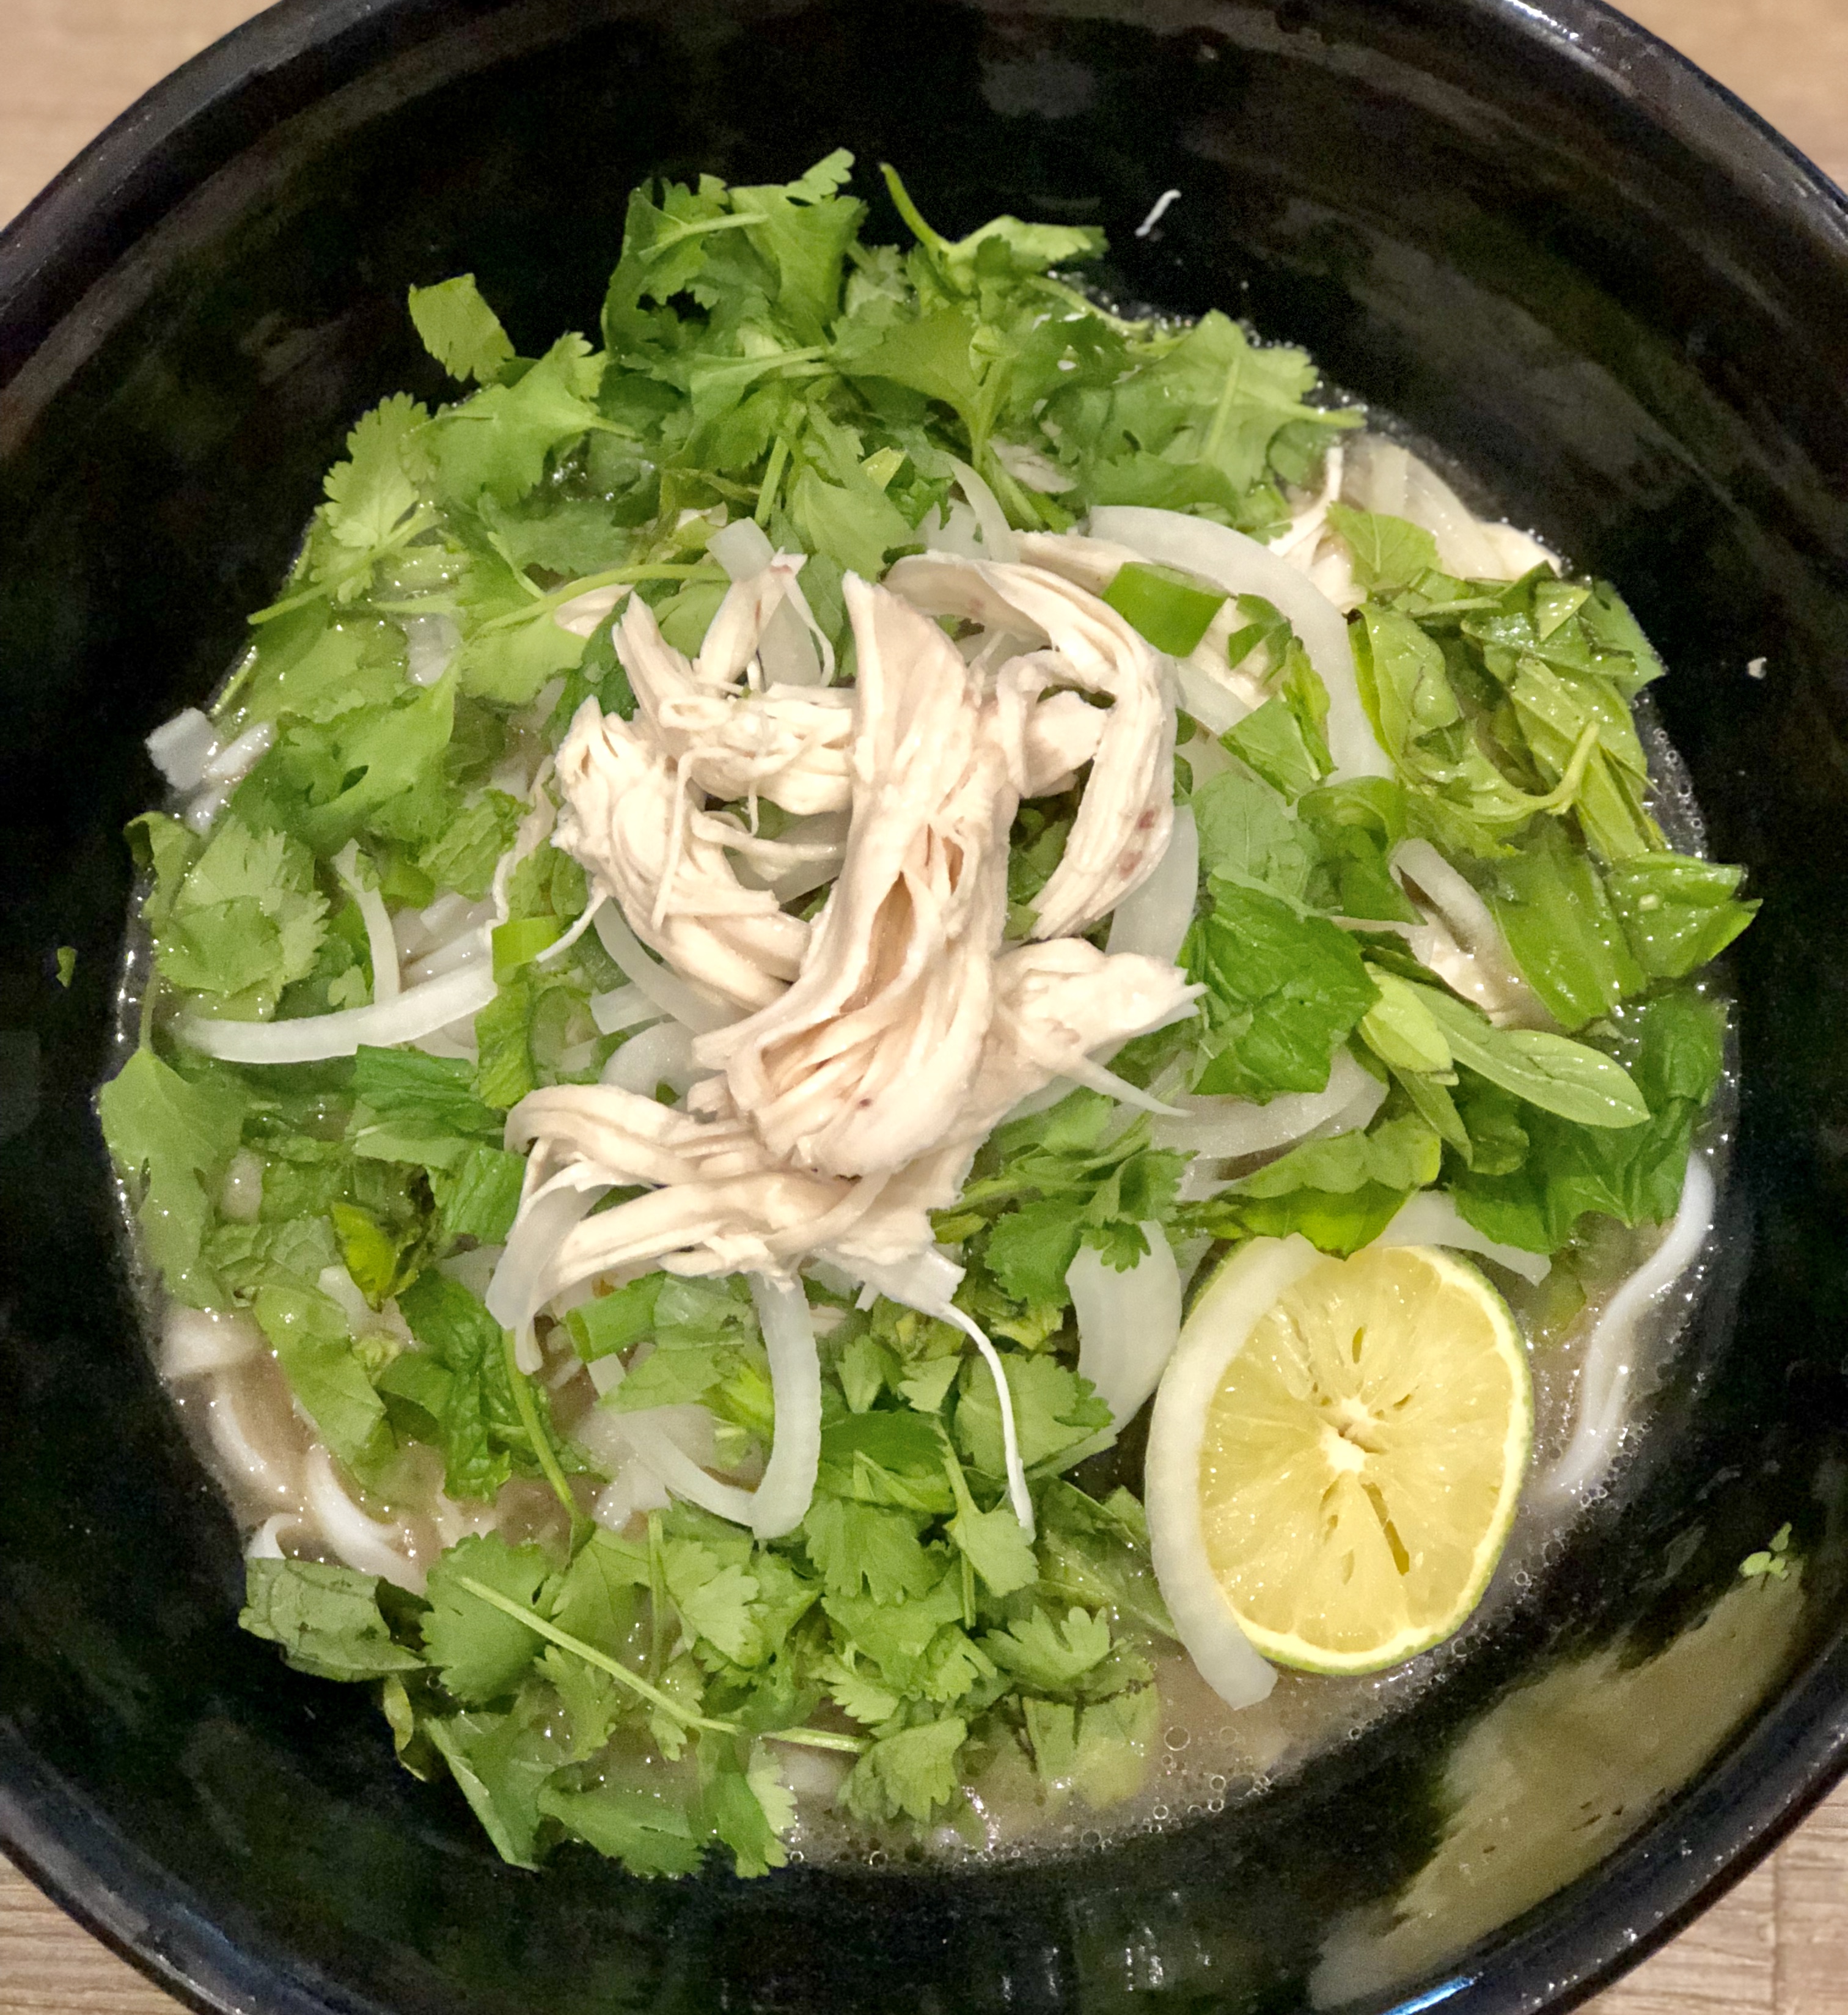
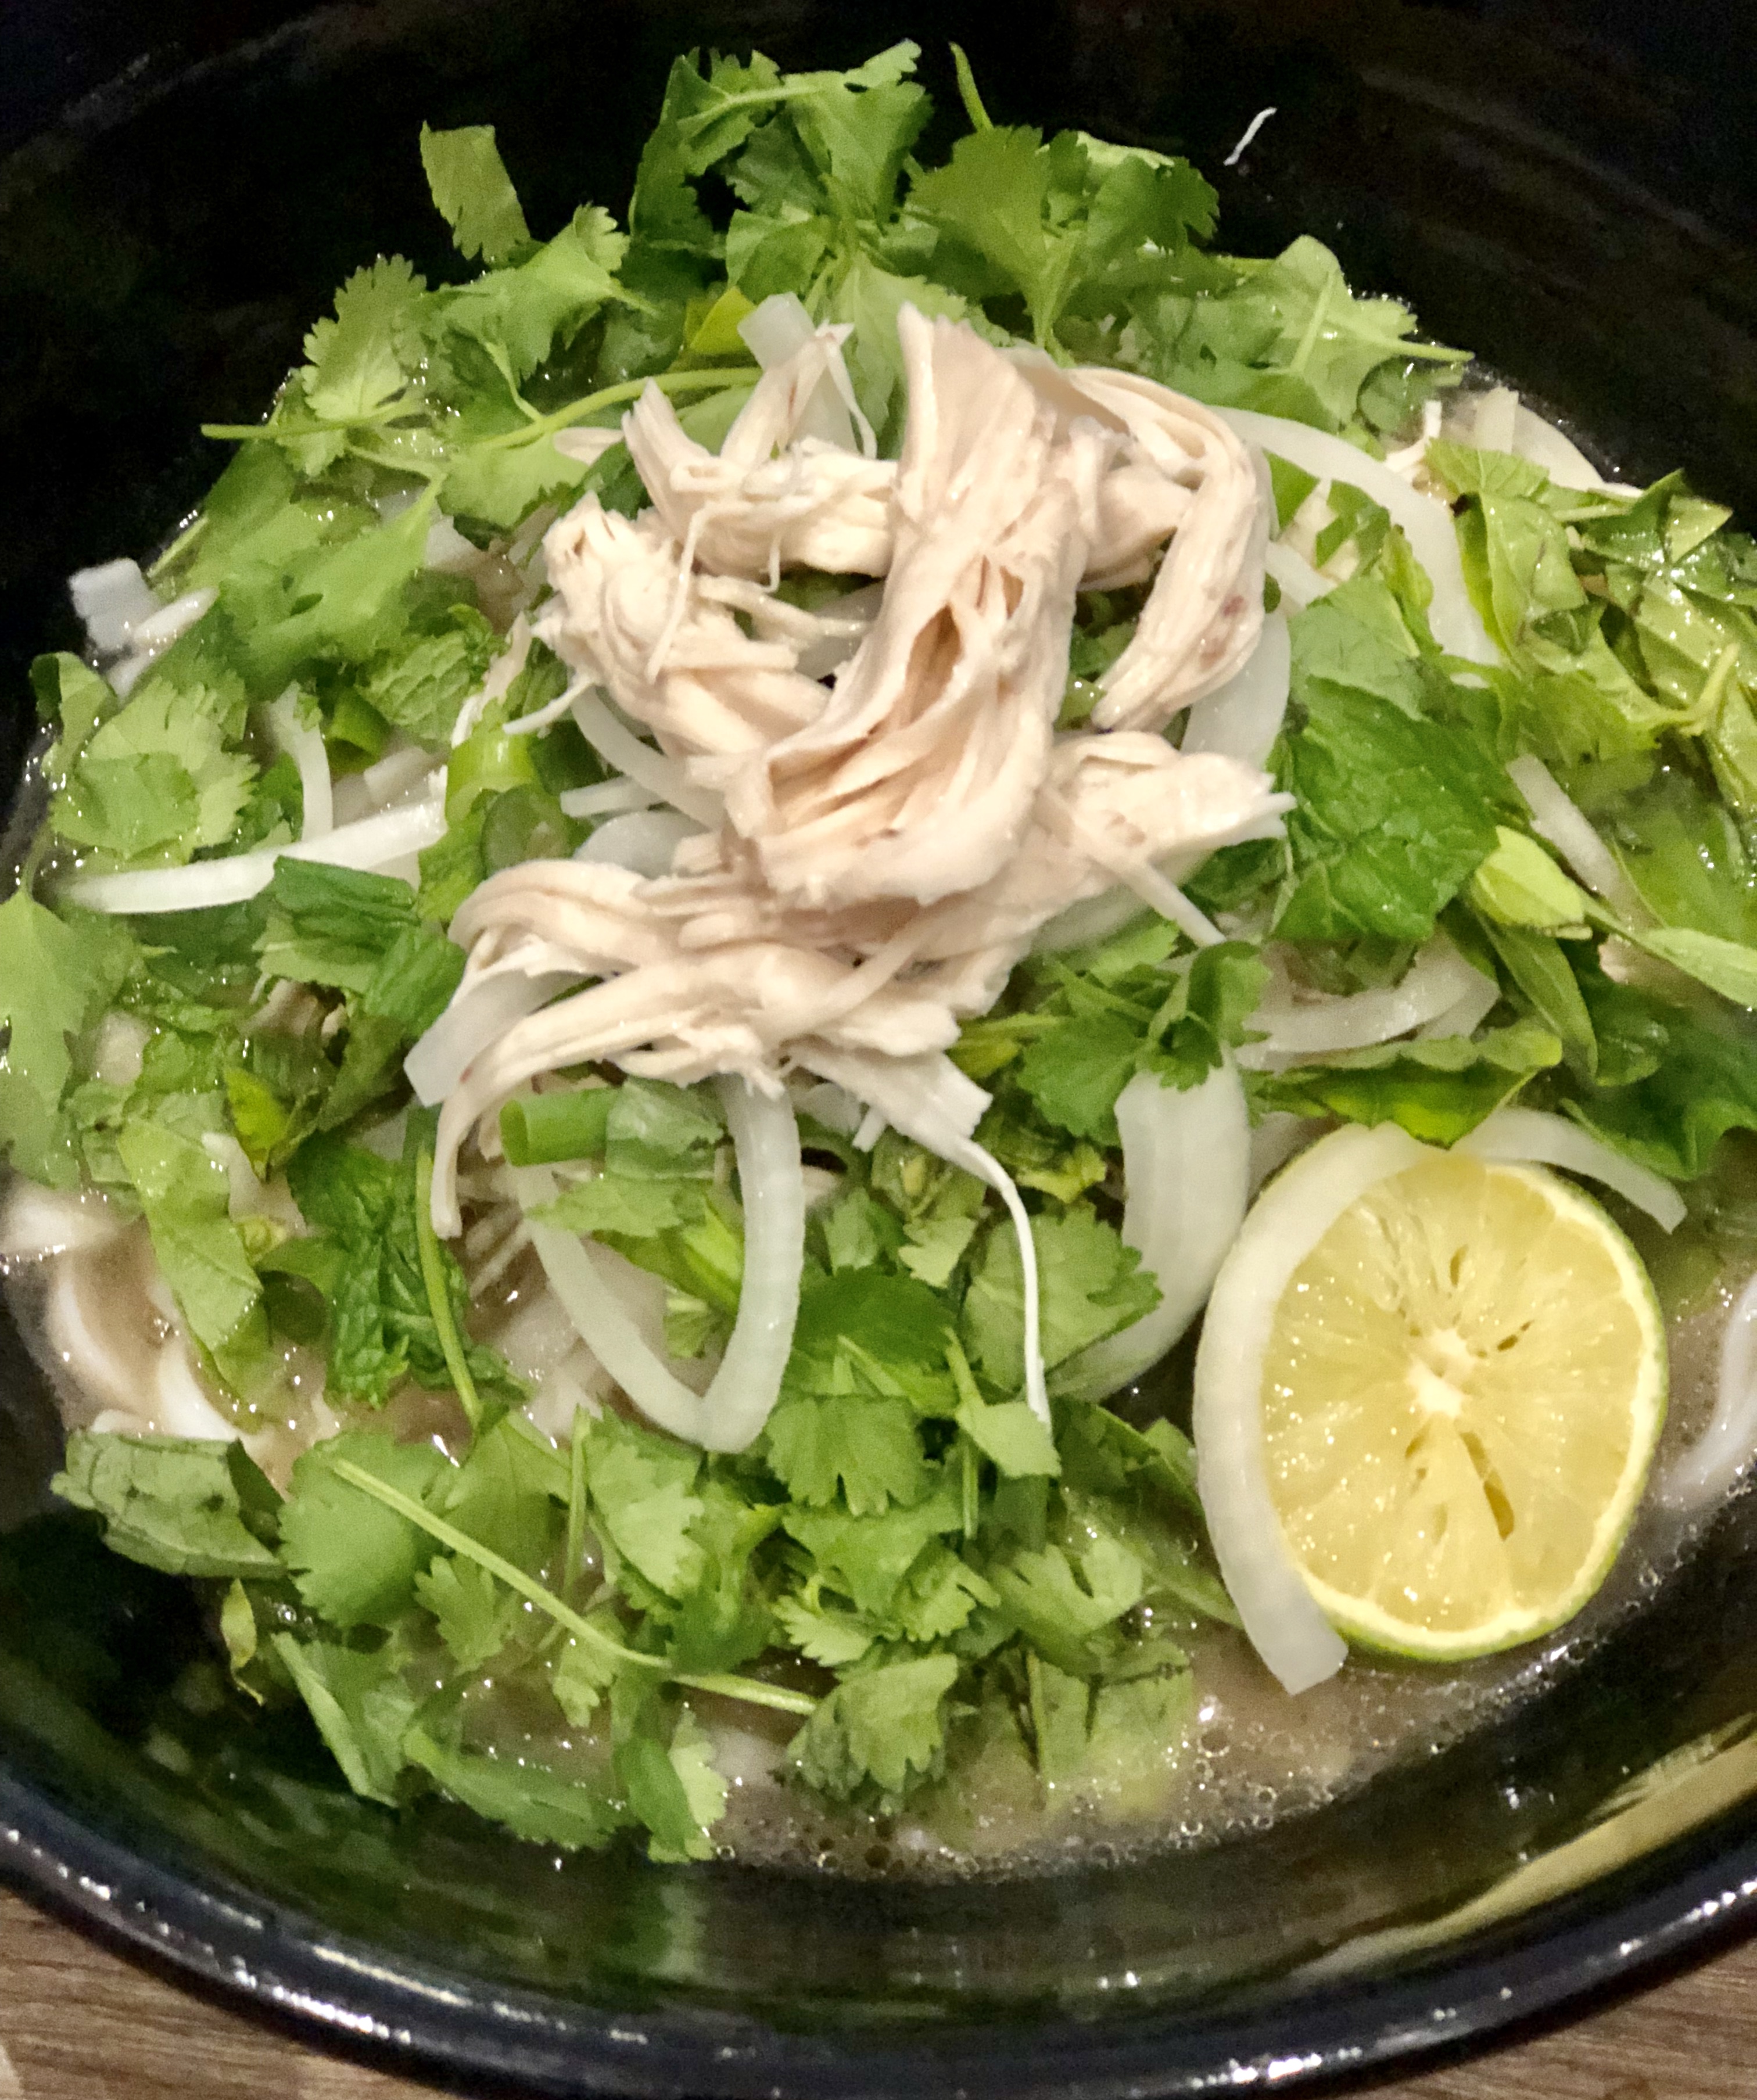
STEP 5: Time to eat! Assemble your bowls.
- set out bowls for your soup assembly line including:
- thinly sliced onions
- green onions
- basil leaves
- bean sprouts (only for those not following a strict anti-inflammatory diet)
- jalapenos (only for those not avoiding nightshades)
- lime wedges
- place a helping of noodles in each bowl; remember, you can run warm-hot water over the rice noodles to help separate and reduce stickiness just before serving
- peel off the boiled skin from the chicken and discard; carve and cut/shred pieces of chicken and place a healthy serving into each bowl on top of the noodles
- proceed down the assembly line and add veggies and garnish; remember to shred/pull apart the basil leaves and place into each bowl
- then using a soup ladle, pour broth over veggies, chicken and noodles
SLURP AWAY AND ENJOY!
Feel free to add a splash or two of coconut aminos for extra flavour. Sriracha also adds a nice zip if you like spice and aren’t avoiding nightshades (chili peppers are nightshades).
As always, don’t hesitate to email me with any questions. And please message or comment @karliskitch if you make this! Would love to know.
Karli 🙂